


Getting organized…isn’t that what we do every January? Because my kids have had such photo happy parents, we have boxes, tubs, and cases full of CD’s, DVD’s and hard drives full of their cute little faces. It’s overwhelming just how much we have.


For those who don’t know it, CD’s only have a short life span of roughly 10 years before they are no longer reliable. That is not a very long time. Even hard drives and back ups are not always trustworthy. For that reason, I feel a big need to finally get at least the best of our images onto paper for another “back up”. Anyone else feeling overwhelmed and wish they started a system on day one?…Me me me!
There are so many ways to organize photos, I love the idea of scrapbooks, but I’m very turned off by all the extra “cute” clutter that cover the pages. With that thought in mind. I decided to make albums/scrapbooks that are simple and also tell the story of each of my kids life.
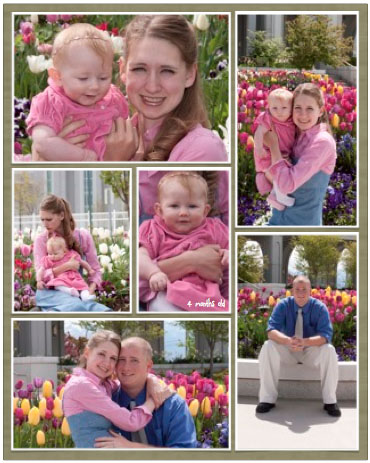
The best idea I came up with, in order to give my albums some style- was to use the program “Pages” (I believe it’s only for Macs, but there must be something similar for PCs- sorry). Using pages, I went to look through all the templates they offer. They do not have a photo album template, but their templates are changeable by dragging photo/text boxes around, etc. So I chose a poster template called “Garden Project Poster”. Choose the smaller size to work on 8.5×11 paper. It had a basic but custom look that I thought would look great printed as well as work for either boy/girl to simplify my life, since this is already a huge project I’m undertaking!


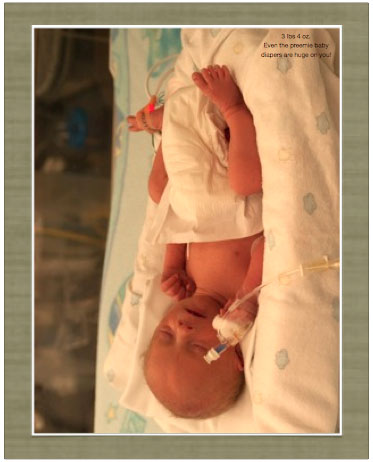
Using that template, I arranged photo boxes and text boxes into a pleasing look. You can then go to “File”, then “Save as a Template”. After I dragged and dropped the photos I wanted into the page, I saved it as a copy into a file on my desktop. Then you can play with that template to make a new page, to add some variety to the look of your album. I created maybe 10 different page templates that I liked. Each template has a varied number of photo boxes on it, some have a place for text, others no text. That way as I’m going through each photo shoot, I can quickly decide which page I want based on how many images I need/want to use and if there is a special memory of it that I want to include. I think the text choice offers a very sweet touch to these pages. Little things I remember about my babies that I may not have otherwise thought about, but it’s recorded here for my kids to smile and giggle at.

Out of my 5 kids I have only begun my 2 oldest kids books, and I’m not done with theirs by all means, but it is a start. And that is better than nothing. Hope to get these all caught up for each of my kids, but it will take me a long time, I’m sure. Eventually I will be printing them out and sticking them into plastic sheets in a binder for each child. I may make duplicates of some of the special pages for my own binder of it all too!

I do love the way they are turning out and I’m very pleased with it. It’s amazing how many memories and thoughts come flooding back to mind mind as I work on these pages. Not to mention the hundreds of images that I get to rediscover that I have forgotten about. It really is a happy project! Hope this idea can work for some others as well. (Sorry it’s not PC friendly)! Now go get started, let me know if you have other ideas or questions on these, I’m happy to help out! 🙂
